Plumbing Terms You May Not Know

Plumbing & Design Terminology

Accent lighting
Lighting that highlights specific items (e.g., art).

Acclimation
Some materials need time to adjust to the climate in a kitchen or a bath before they are installed/used.

Alcove
A recessed area.

Ambient lighting
Subtle lighting that creates a soft, mellow feeling in a room.

Amperes, Amps
Unit of electrical current.

Anti-microbial finish
A finish that helps prevent the growth of bacteria, fungi, etc.

Apron
Trim found below a tabletop.

Auxiliary sink
A secondary sink in a kitchen that is often used for food prep or clean-up.

Backflow prevention device
Devices designed to prevent backflow (the reversal of the normal direction of wastewater from a home to other buildings).
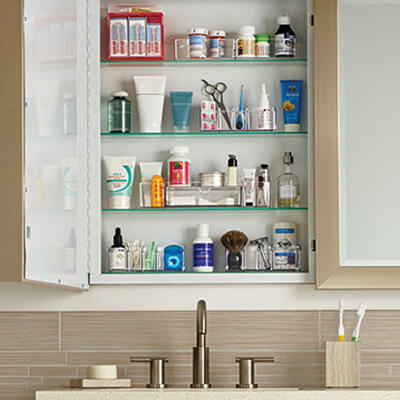
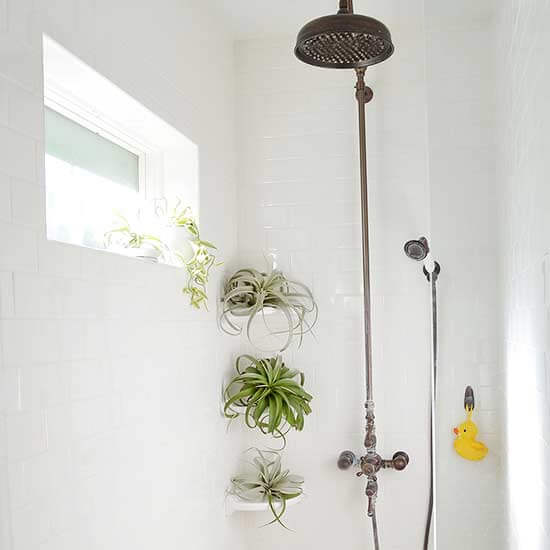
Backsplash
The area between the bottom of wall cabinets and the top of countertops.
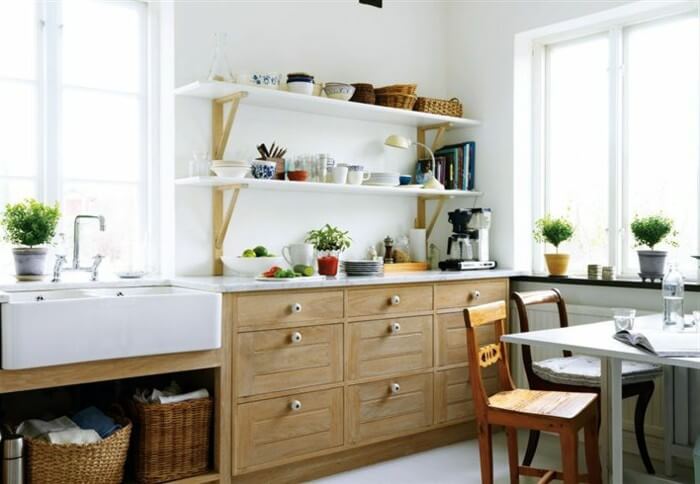
Base cabinets
Floor cabinetry with countertops.

Bearing wall
A wall that holds a heavier load above it.

Bidet
A bathroom fixture with a straight up, vertical water jet that is designed for personal cleanliness.

Clear space
In a bathroom, a clearance area for toilets or showers. In a kitchen, a clearance area around appliances or work areas.

Console sink
A basin supported by legs instead of base cabinetry.

Dual-Flush T minute (GPM or gpm)
The rate water flows through a fixture/fitting at a specific pressure.

Gallons per flush (GPF or gpf)
The total volume of water required to flush a toilet or urinal, measured in gallons.

Grab bars
Bars installed in showers and bathtubs to help prevent falls.

Gravity-fed toilets
Toilets that rely on the force of gravity to flush.

Green design
A design with environmentally friendly materials and/or energy use.

Heat Recovery Systems
Systems designed to capture waste heat from another source and use it to heat areas that would normally be heated by a furnace, etc.

High efficiency toilet (HET)
A toilet that consumes less water per flush.
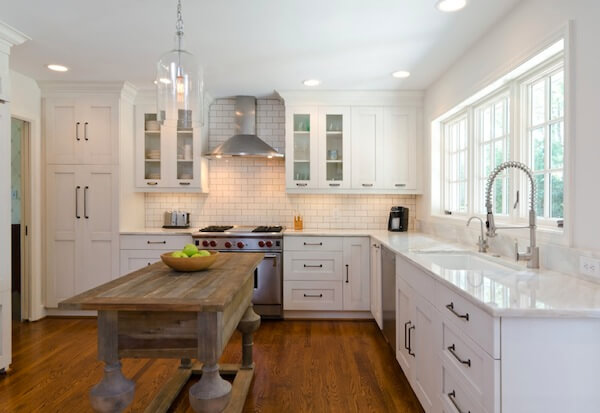
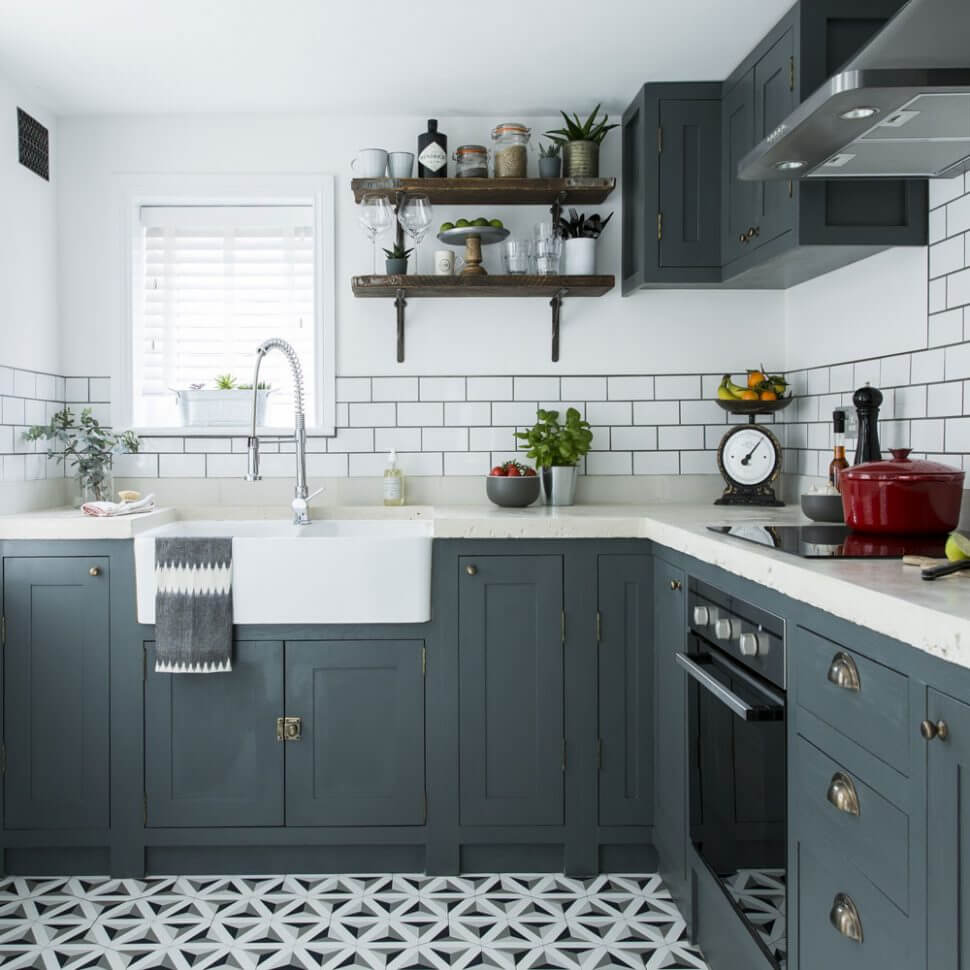
Island
A cluster of cabinets that can be walked around/accessed from all sides.

Lazy Susan
A corner cabinet with shelves mounted on a vertical axle so that they spin.

Lead time
The time between when a product is purchased to when it is delivered.

LEED (Leadership in Energy and Environmental Design)
A national rating system for developing high-performance, sustainable buildings and homes.
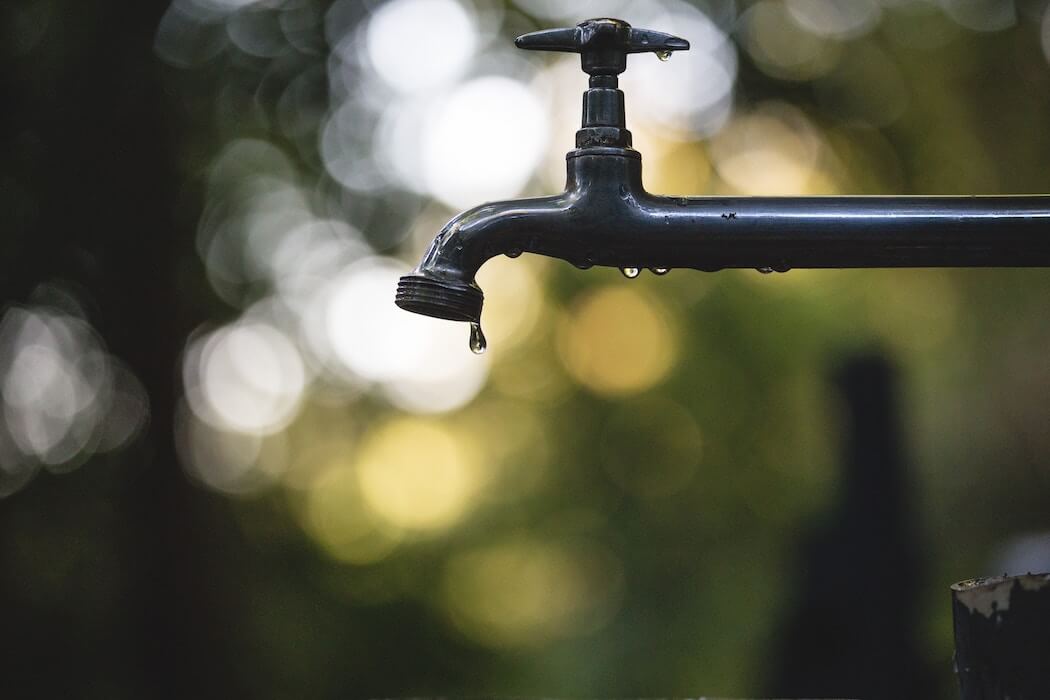
Low-flow
Plumbing fixtures/fittings that use less water and meet water efficiency standards.

Peninsula
An area of cabinets or countertops that can be walked around/accessed from three sides.
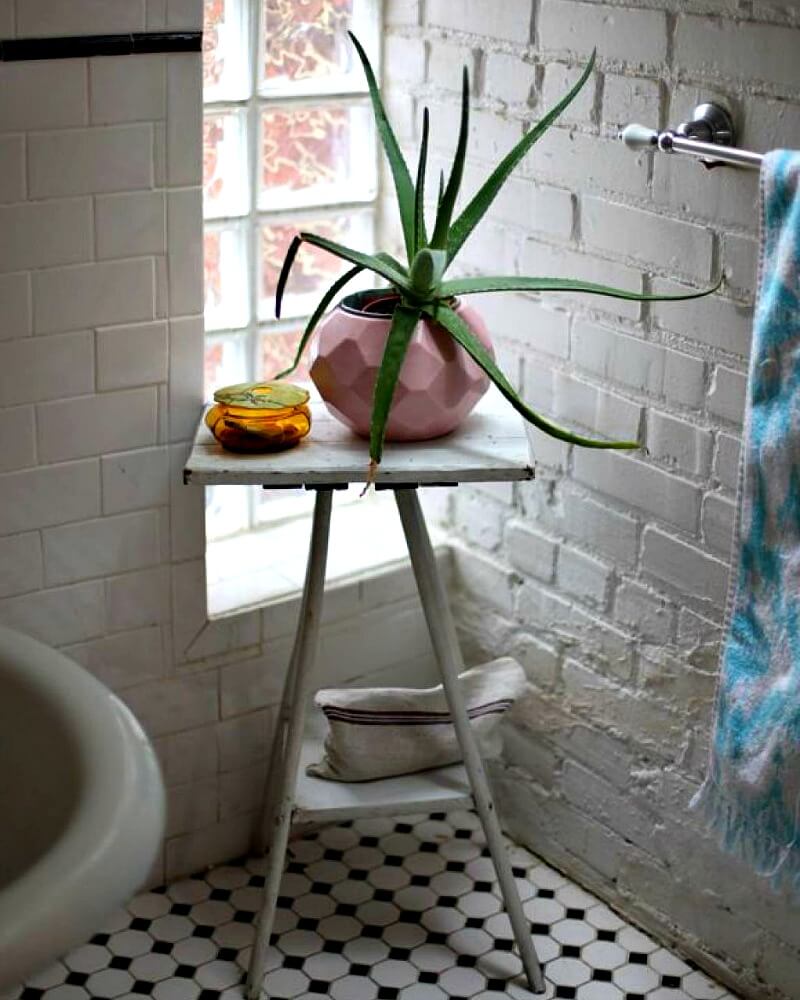
Powder room
A small bathroom consisting of a toilet and sink.

Primary center
The three main work areas in a kitchen: primary sink, cooking surface and refrigeration.
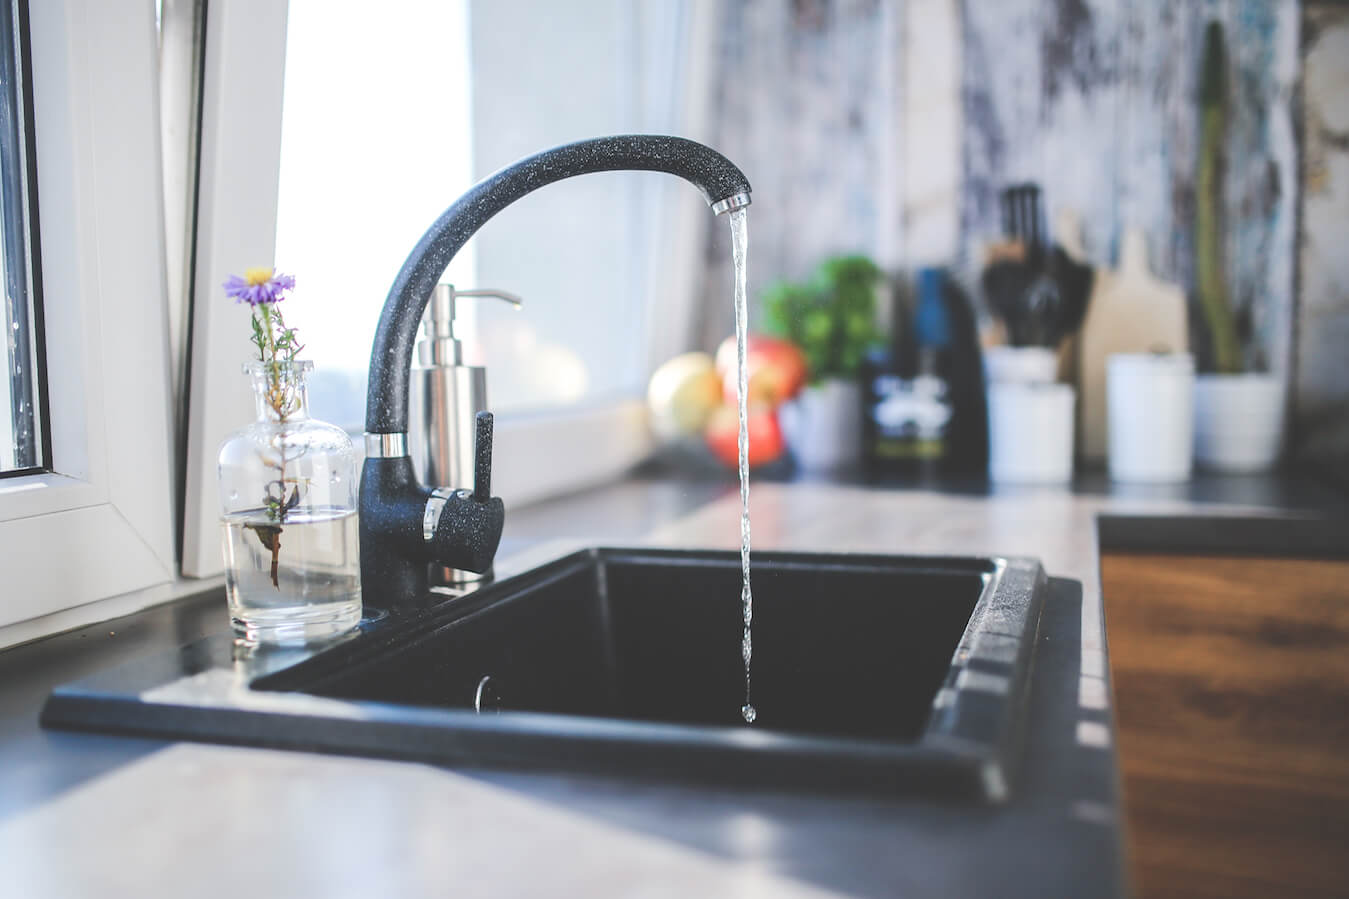
Primary sink
In a kitchen, the sink that is used the most.
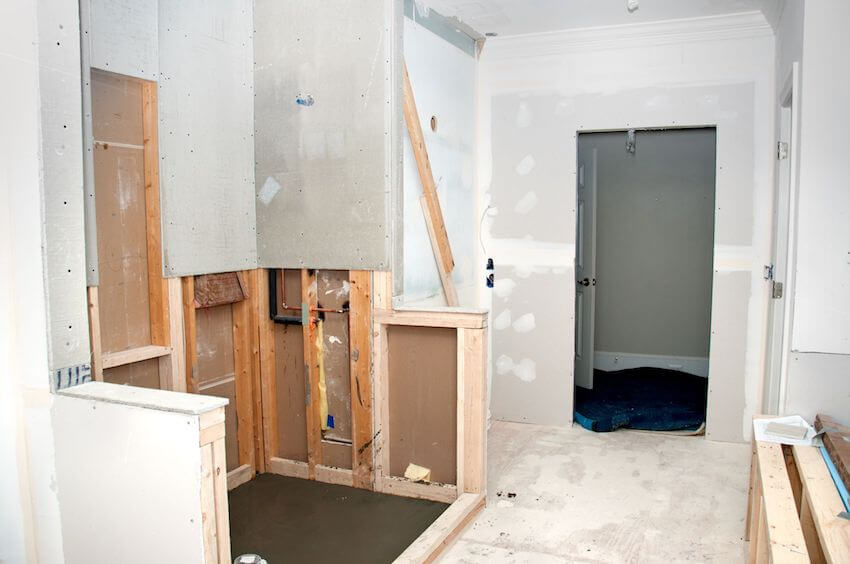
R&R
Standing for “remove and replace”, a simple remodeling project involving the removing and replacing of fixtures, cabinetry and appliances. No structural or mechanical alterations are involved.

Reclaim
To reuse materials (e.g., stone, tile or brick) or products after their initial use.

Renewable resource
Organic materials, such as bamboo, that have quick regeneration periods to full maturation.

Replacement kitchen
A remodel where new cabinets/appliances are installed in the same locations as existing cabinets/appliances.

Retrofit
An item that replaces originally installed components on appliances or fixtures.
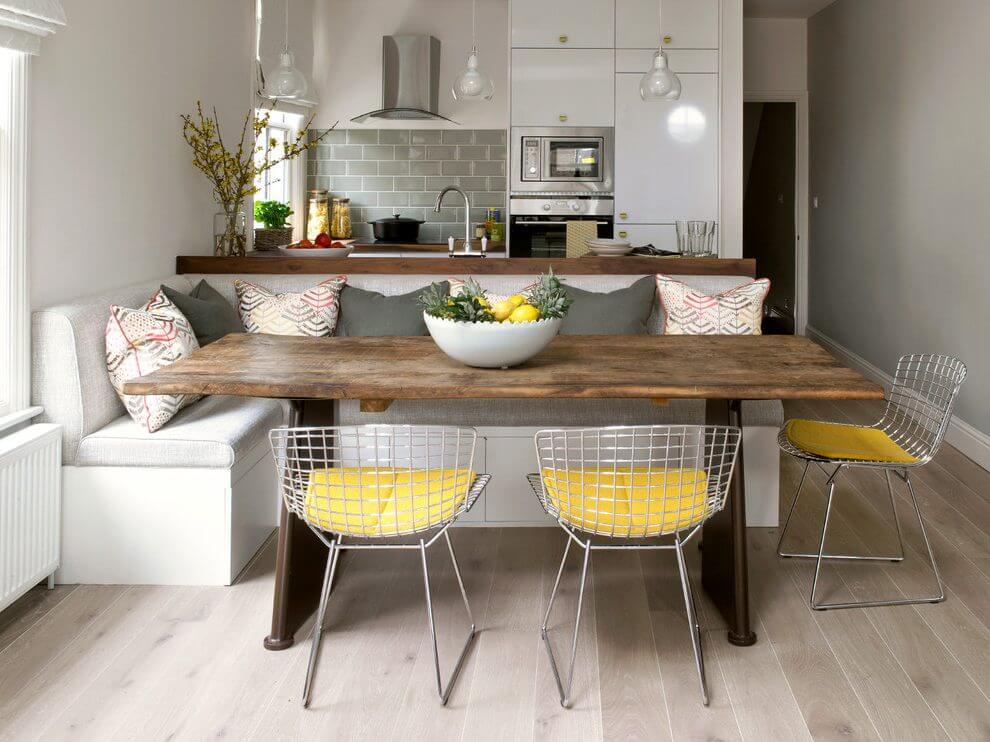
Snack bar
An area of countertops used for eating.
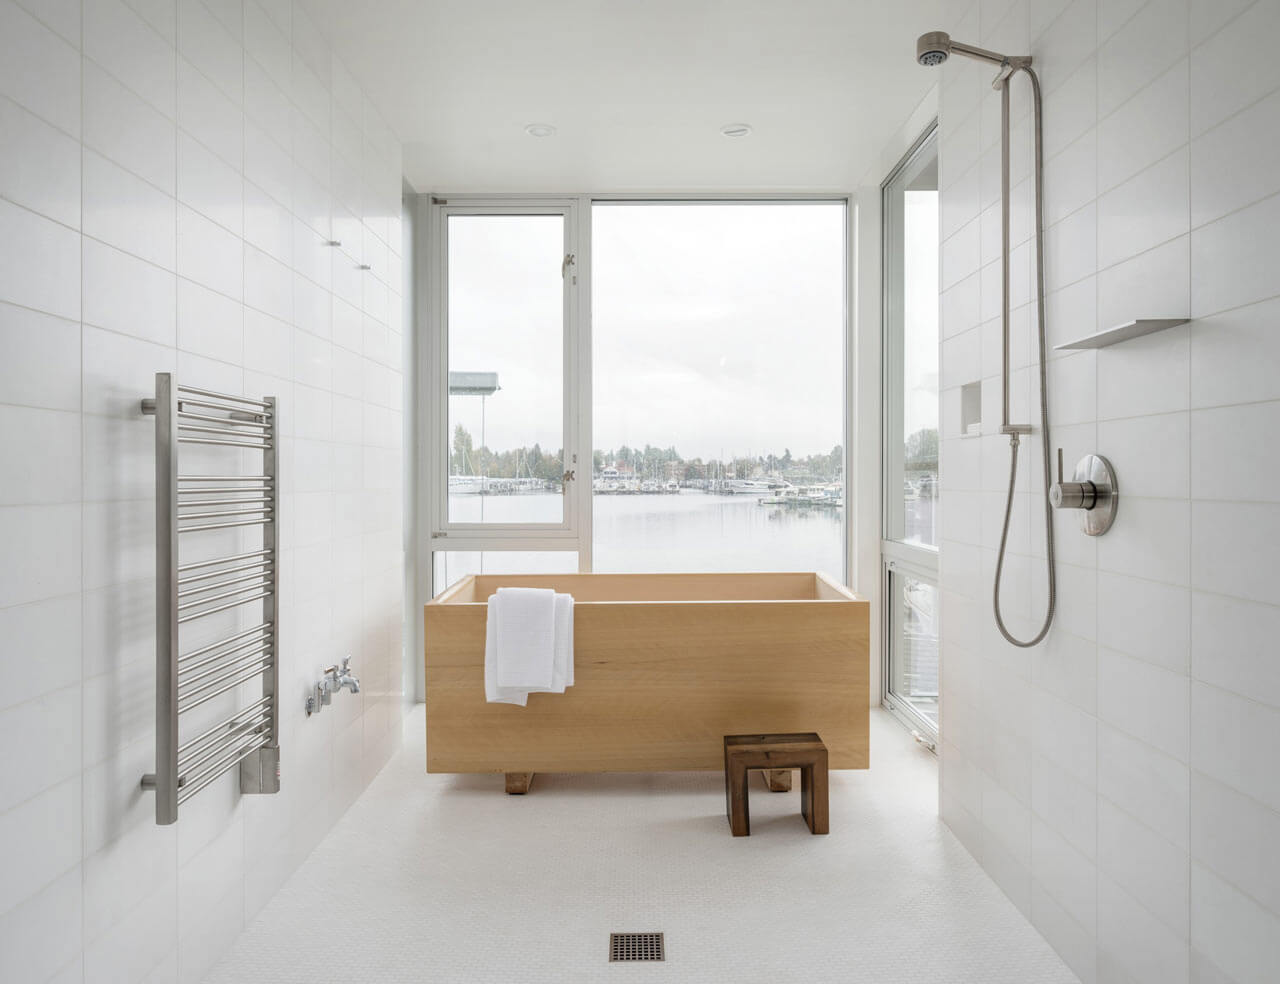
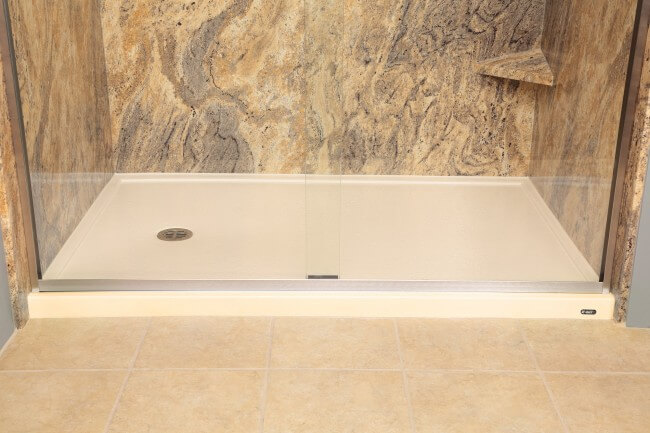
Soaking tub
A deep tub that allows the bather to submerge to his/her neck.

Spa tub
A large tub that has whirlpool action and seats for multiple users (i.e., a hot tub).

Task lighting
Lighting that is focused on a specific area, usually a work area.
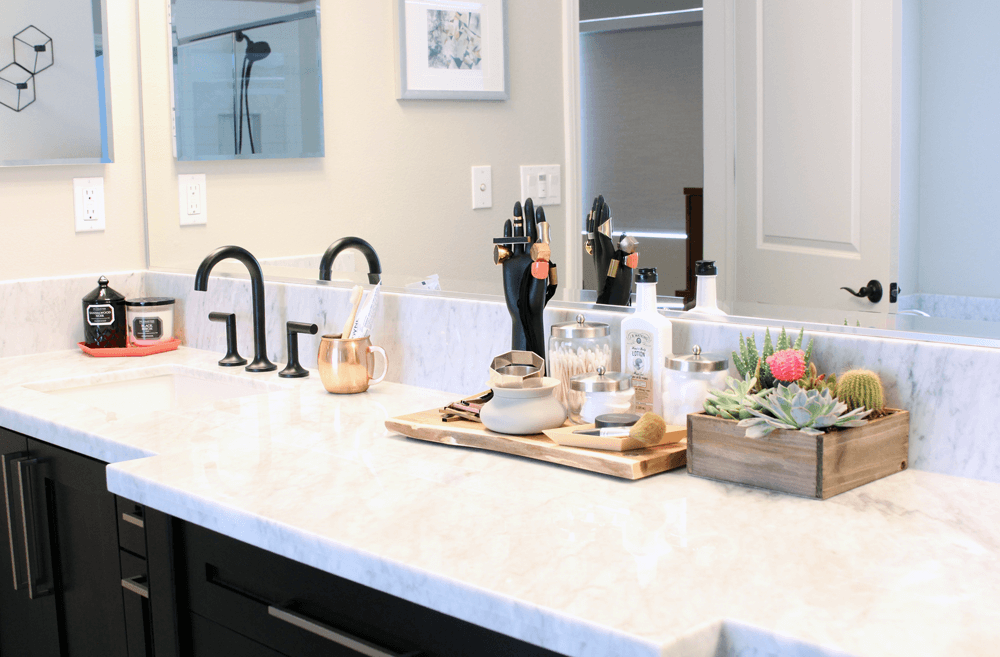
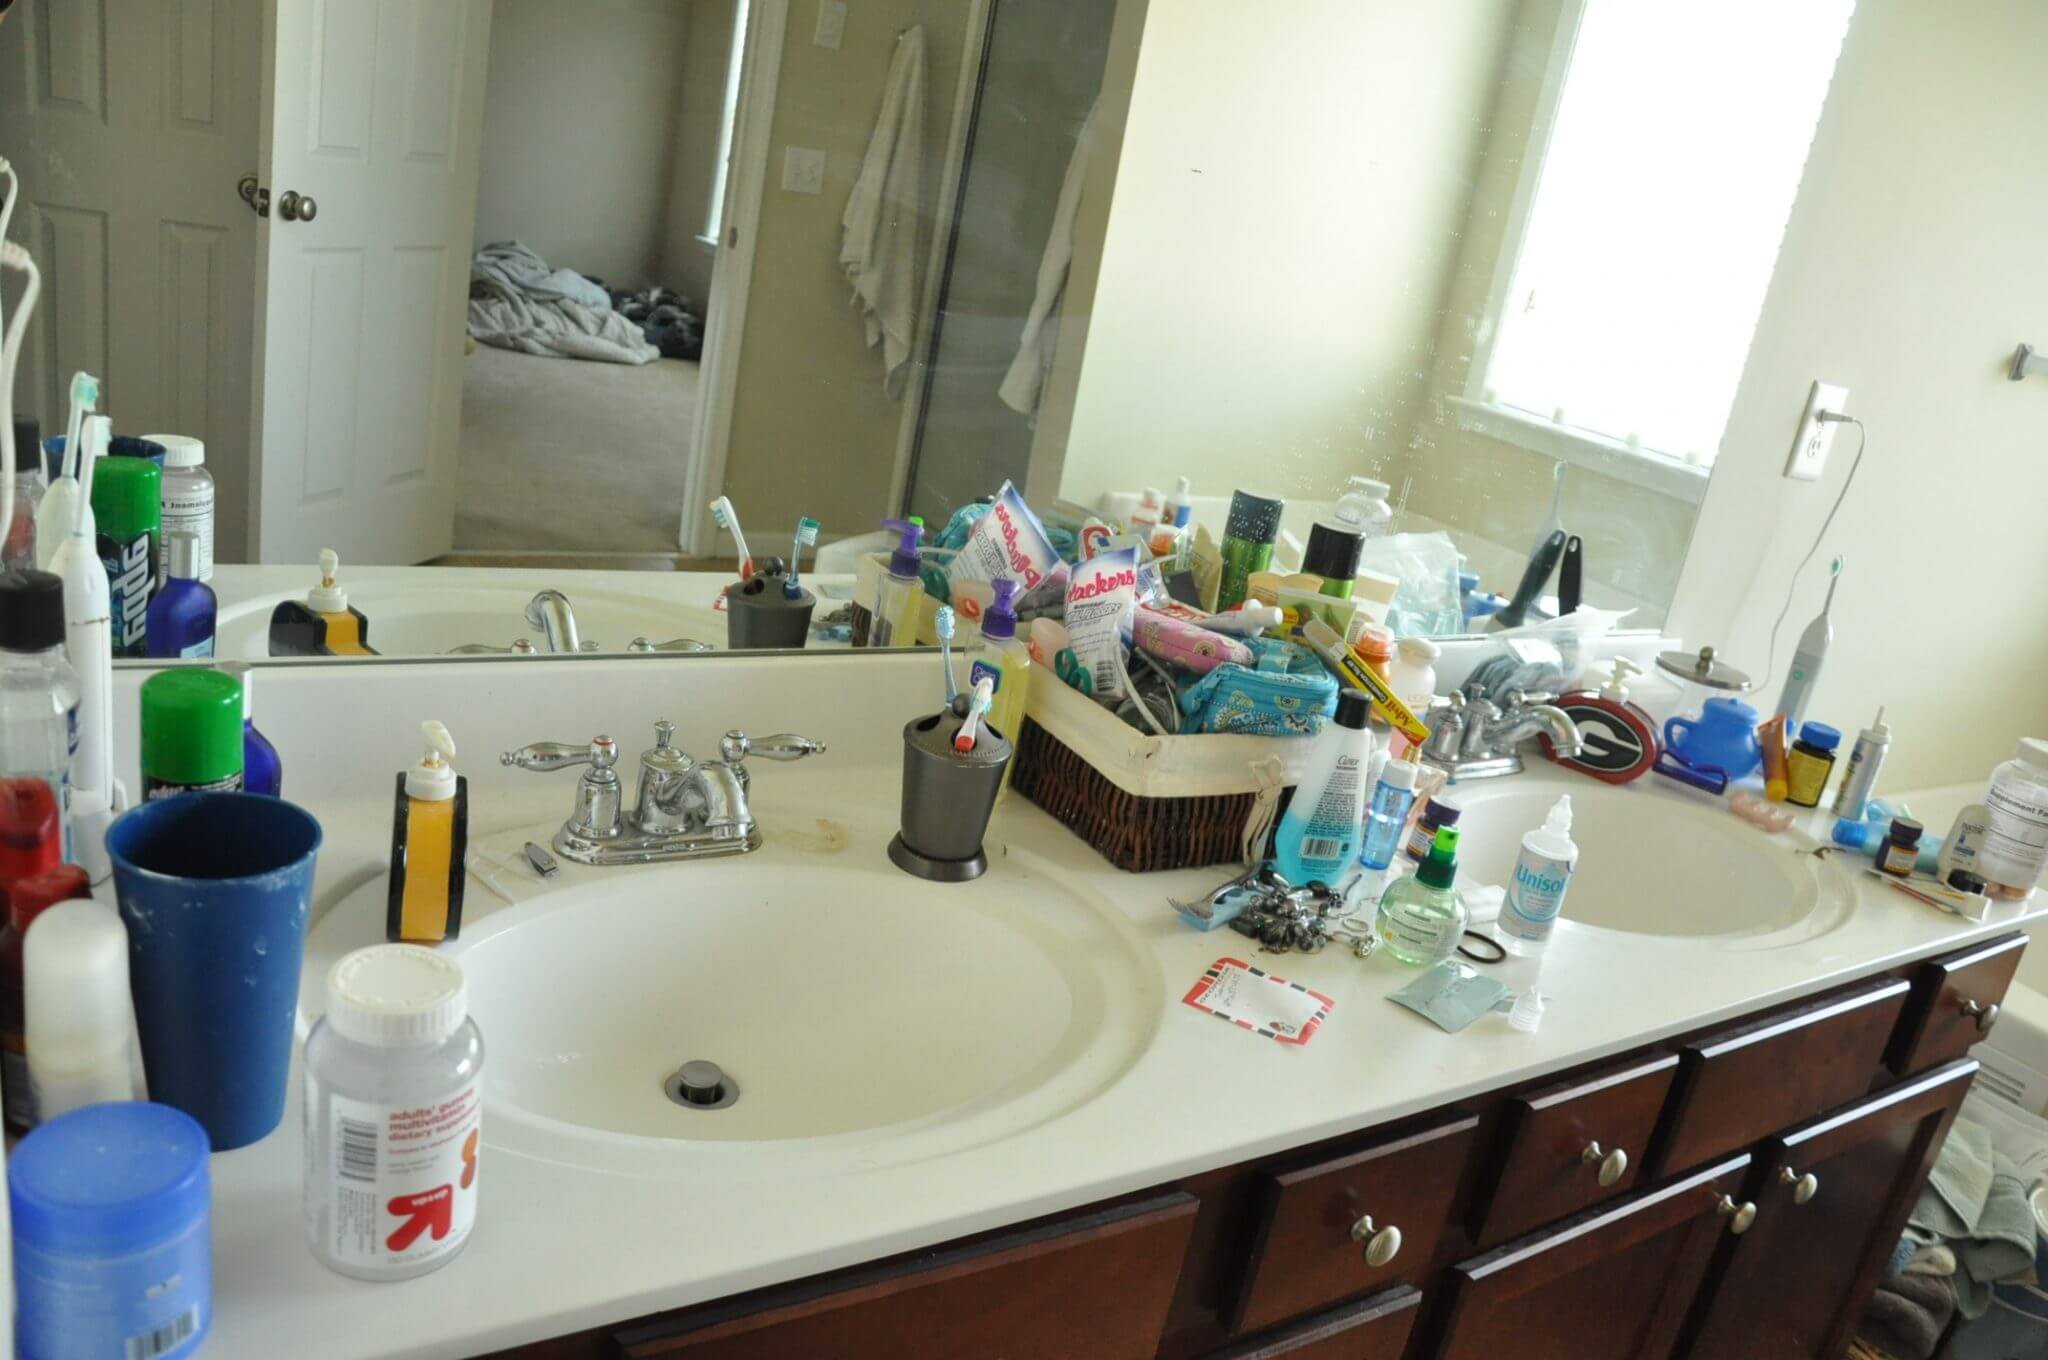
Vanity
Bathroom cabinetry with a sink(s) and usually a mirror.

Whirlpool
A bathtub with jets.

Ultra-low-flow
Ultra-low flow fixtures and fittings that exceed the water efficiency standards.

6 Easy Ways to Clear Out Bathroom Clutter This Weekend

6 Easy Ways to Clear Out Bathroom Clutter This Weekend

You probably store a lot of products, towels and other necessities in the bathroom. From toothbrushes and toothpaste to shampoo and shower gel, the room needs to hold everything involved in your daily routines. Consequently, you may find that your bathroom can become cluttered fairly easily. This is especially true when you have a small bathroom and lack in space to begin with.

No matter the size of your bathroom, the space will feel much airier once you have decluttered it using these six simple steps:

6 Ways to Clear Out Your Bathroom Clutter

6 Easy Ways to Clear Out Bathroom Clutter This Weekend - Hotel Toiletries

Image Credit

1. Use It or Lose It

One of the simplest ways to declutter your bathroom is to set aside some time to go through all your products and decide what you actually use and get rid of the rest. After all, how many hotel shampoos and conditioners does one person really need? The same goes for all those odds and ends that are either broken or never used. Remember that blow dryer that has not worked for more than a year? It’s time to let it go.

Sorting through all your cabinets and drawers and getting rid of the things that you do not use will free up space for the products that you actually need. Plus, now you will most likely have the space to store them in a more organized manner. It is a win-win.

6 Easy Ways to Clear Out Bathroom Clutter This Weekend - Clear the Countertop

Image Credit

2. Clear the Countertop

If you have guests coming over and need to get rid of clutter quickly, clearing the countertop should be your first step. If your bathroom is feeling a bit cramped, chances are that a lot of the blame lies with all the items that are lying out around the sink. Invest in some baskets and other containers to put in your drawers. This will help make it easier to put things away quickly without creating a jumbled mess.

While you will probably want to keep a few things on the counter, try to avoid more than is necessary. Having that open area will help make the room appear more spacious. HGTV even recommended installing wall-mounted holders for items like soap and your toothbrush to decrease clutter on the counter.

Another tip to reduce bathroom clutter from your countertops is to store hair dryers and other hair tools in a file organizer. Hair care appliances, such as blow dryers, hair straighteners, and curling irons can take up a lot of space in your bathroom. Pick up a file organizer or magazine rack next time you hit an office supply store. Attach the organizer or rack to the side of your bathroom sink or inside a cabinet door. Now, you have somewhere out of the way to store these goods.

6 Easy Ways to Clear Out Bathroom Clutter This Weekend - Make the Most of Your Space

Image Credit

3. Make the Most of Your Space

Don’t feel confined if your bathroom vanity is tiny or if you have a pedestal sink! All you need to do to create more storage opportunities is get creative. For example, the empty space above your toilet is the perfect spot for a few extra shelves, as is the area under the sink. While it might be difficult to fit a full-sized cabinet in the bathroom, you may also be able to add thin or short set drawers in a narrow gap. Better Homes & Gardens recommended considering half-height cabinets under the windows for extra storage room that will not overwhelm the space.

While extra storage options can really decrease the clutter in your bathroom, make sure you do not overdo it. If you cram every spare inch with a cabinet or basket, your bathroom will still look crowded even though it’s more organized. If you have a nearby closet, consider storing some products there that you do not use as often, such as first aid supplies.

6 Easy Ways to Clear Out Bathroom Clutter This Weekend - Clear Out Your Medicine Cabinet

Image Credit

4. Clean Out Your Medicine Cabinet

Reduce bathroom clutter by taking the time to clean out your medicine cabinet. There’s no need to keep expired medications or hair accessories that have seen better days. Things you aren’t using or those that aren’t necessary could be taking up valuable space in your medicine cabinet. Weed those goods out to make room for what you do need on hand in the bathroom.

6 Easy Ways to Clear Out Bathroom Clutter This Weekend - Choose Minimalist Decor

Image Credit

5. Choose Minimalist Décor

If you have a small bathroom, or just want your space to appear larger, choosing a minimalist bathroom theme for your decor is the way to go. Keeping the aesthetic of the room simple will help the space look less cluttered. Pass on clustered small candles and picture frames and opt for a single bathroom plant on the counter or a lone painting on the wall. A good rule of thumb is to avoid any decoration smaller than a grapefruit. When it comes to decorating your room, less is more when clutter is a high concern.

You can also choose simple fixtures and bathroom accessories to complement your minimalist theme. To find the perfect options for simplifying your bathroom decor, visit a Kitchen & Bath Classics showroom, where you can explore a wide selection of faucets, shower heads, and more. Sleek, modern fixtures will give your bathroom a clean, organized look that you are sure to love.

6 Easy Ways to Clear Out Bathroom Clutter This Weekend - Take Advantage of the Doors

Image Credit

6. Take Advantage of the Doors

When it comes to storage space, don’t forget some of the less obvious places, like the back of cabinet doors. Better Homes & Gardens recommended attaching magnetic strips or small hooks on those areas to help organize and hide away your smaller bathroom items, like manicure scissors or hair accessories. The back of the bathroom door itself can also be used for additional storage. You can easily hang a rack over the door that will keep your extra towels organized, but close at hand.

Lastly, in order to clear out bathroom clutter, install a shelf in the space above the bathroom door. To do this, simply secure a pair of shelf brackets on either side of the bathroom doorframe. Then, attach a shelf to the brackets. Now, you have extra storage space for bathroom goodies such as toilet paper rolls, soaps, shampoos, and other toiletries.


Looking to revitalize your bathroom? After you’re done clearing out bathroom clutter following the tips above, head to a Kitchen & Bath Classics showroom for other ways to create your best bathroom!

Featured Image Credit

Kitchen Flooring: How to Choose the Best Option (Types and Tips)

Kitchen Flooring: How to Choose the Best Option (Types and Tips)

So you’re ready to revamp your kitchen. Whether you’re remodelling your kitchen as a whole, or just focusing on the floors, choosing the right kitchen flooring is essential. Kitchen floors can serve as anything from a neutral backdrop to a vivid focal point for the room. To make sure you’re choosing the right kitchen flooring, check out our guide below for how to choose the best option.

Kitchen Flooring: How to Choose the Best Option (Types and Tips) - What to Consider

Image Credit

What to Consider for New Kitchen Flooring

When you’re choosing new kitchen flooring, there are several factors you need to take into consideration including your lifestyle, your style sense, comfort, the ease of cleaning, and the cost.

Your Lifestyle

It’s likely that messy ingredients get spilled and dropped occasionally (or regularly) in your kitchen. When choosing the best flooring for a kitchen, consider options that will stand up to the regularity of wear and tear around your kitchen. If you have young children or elderly parents around the home, nonslip floors are an important pick for safety.

Your Style

What’s your kitchen style? When shopping for kitchen flooring, you’ll of course want to think about how the flooring will compliment your kitchen as a whole. No matter what the vibe of your kitchen is—whether it be rustic or contemporary—consider the kitchen’s size and colours, textures, and patters already existing in your kitchen.

Comfort

Are you in the kitchen for hours, slicing and dicing to prepare your family’s meals? Or, are you rarely spending a long amount of time on your feet in this room? Comfort is key when it comes to choosing the ideal flooring for your kitchen. If you find you’re usually on your feet for long periods of time, opt for floors with a bit of softness and resilience.

Cleaning

The kitchen is an easy place to create a mess. Between the foot traffic and tracked-in dirt, and spills from eating and drinking, kitchen floors can require a good amount of cleaning. To minimize the time you spend maintaining your floors, choose a material that’s easy to clean, and resistant to stains, HGTV recommends.

Price

Of course, cost is a big consideration when looking into types of flooring. If you’re renovating your kitchen, don’t forget to consider how the rest of your budget will be spent on things like the kitchen island, kitchen lighting, and cabinetry. After determining your budget for your flooring, you’ll want to measure the space to get an idea of the square footage. Keep in mid that in addition to the materials, other costs may apply such as underlayment, delivery, installation, etc.

Kitchen Flooring: How to Choose the Best Option (Types and Tips) - Tile in Kitchen

Types of Kitchen Flooring

Sheet Vinyl

If you’re looking for waterproof and stain-proof kitchen flooring, sheet vinyl may be the ideal flooring for your home. This type of flooring is resilient and easy to clean. Sheet vinyl feels slightly soft under your foot, making hours of food prep a little less fatiguing.

If kitchen vinyl flooring fits your lifestyle, style sense and comfort, it’ll likely also fit in well in your home and wallet since it is durable and a breeze to clean, as well as well-priced. According to DIY Network, some sheet vinyl flooring options are downright inexpensive. 

Porcelain Tile

For durability and a beautiful appearance, look no further than porcelain kitchen tile. Porcelain tile is an upgrade over regular ceramic tile for kitchen flooring because it’s produced through a different process. This process makes it harder and less porous than ceramic tile. Materials that are harder and less porous make for ideal flooring for a kitchen, as they will hold up easier to spills and messes.

If you choose porcelain kitchen tile flooring, you’ll have two options for the finish of the tile: glazed or unglazed. The glazed porcelain tiles have a glass-like coating that can be made in a variety of colours. Unglazed porcelain flooring tiles have a naturally earthy colour that comes from the clay used to make them. Porcelain kitchen flooring can even be a safe option, as some porcelain tiles are certified by the Americans with Disabilities Act (ADA) to be slip-resistant.

Hardwood

Hardwood kitchen flooring is known for its combination of warmth and beauty. Like sheet vinyl, hardwood is also a type of flooring that is comfortable underfoot. Combining durability with low-maintenance, hardwood may be a good flooring option for your entire house. For that reason, hardwood works great if you have an open floor plan and want to extend your hardwood flooring beyond your kitchen.

While spill should be wiped up immediately, properly finished hardwood flooring is resistant to moisture. Hardwood flooring options include solid wood or engineered wood planks. Solid hardwood flooring is a homogeneous product all around. Engineered wood flooring is a layered product made of a thin slice of real hardwood that’s placed on top of a base of high-quality plywood, according to The Spruce.

Cork

Cork flooring in a kitchen is another option to consider. This is a waterproof, resilient, and moisture-resistant flooring option. It is also more comfortable than other floors! That’s especially important for a room that you spend most of your time standing up in. Cork kitchen flooring is also a safe choice, as it offers some slip resistance.

Made from tree bark that grows back, cork is a sustainable material. Cork flooring comes pre-finished, but it will need to be resealed every 3 to 4 years. Resealing helps to keep the surfaces looking fresh. It also helps prevent scratches on the surface.

Linoleum

Lastly, like cork, linoleum is another environmentally-friendly flooring option for your kitchen. Linoleum made mostly of linseed oil, which is a naturally occurring substance extracted from flax seeds, according to The Spruce. The linseed oil is mixed with other natural and renewable materials such as biodegradable cork powder.

This flooring is not only resilient and moisture-resistant, but it also comes in many patterns and colours. That means you can find the perfect pick for your kitchen.

Now that we’ve guided you through the types of kitchen flooring and how to choose the right one, head to a Kitchen & Bath Classics showroom to get the rest of the kitchen essentials you need to complete your look.

8 Stellar Strategies for Making the Most of a Small Kitchen

Just because your cooking area is on the cozy side doesn't mean you have to sacrifice style and practicality.

Maybe you’re a millennial living in a cramped apartment in the big city. Perhaps you’re an empty-nester who is in the process of downsizing the family house. Whatever your reason for having a smaller living space is, you’re likely struggling with a small kitchen. But just because your cooking area is on the smaller side, you don’t need to sacrifice style or practicality!

There are a number of surefire strategies that you can implement to ensure that you get the very most out of your kitchen. Check out our handy guide to making the most of a small kitchen below:

8 Stellar Strategies for Making the Most of a Small Kitchen - Add a Kitchen Island

Image Credit

1. Make Use of a Small Kitchen Island

While we tend to associate kitchen islands with larger kitchen layouts, you can still add an extra work station to your tiny kitchen. As Good Housekeeping advised, smaller islands with shelves and drawers can be used not only to prepare food, but also store a range of items, such as essential kitchen utensils, pots and pans, appliances, cookery books and so on. This will free up space on your countertops and allow for a more polished and put-together vibe.


4. Remove Unnecessary Items

Much like other rooms in the house, many of us will have items in our kitchens that we rarely use. Remember that panini maker you got for Christmas? What about those cans of soup you have stashed away for a rainy day? One surefire way to free up space is to spend an afternoon organizing your kitchen and removing items you no longer need.

Throw out food that has exceeded its sell-by date and donate cans of food to your local food bank. You probably also have pots, pans, and miscellaneous clutter laying around, too. Head out to the shop and pick up some stylish baskets to keep them hidden without creating an eye-sore. The boxes can be stored out of the way in the space above your cupboards.

8 Stellar Strategies for Making the Most of a Small Kitchen - Use Hooks or a Pegboard

Image Credit

2. Use Hooks

One great way to save on space is to hang items on hooks, Kitchn suggested. Consider hanging some hooks above your stove and letting your frying pans and pots hang down above the area. Not only does this make great use of empty space but it also serves an aesthetic function by helping to create a more rustic look in a simple kitchen.

Whether it’s the side of your cabinets or the sides of your kitchen islands, be sure to hang hooks and make the most of empty space, while also keeping in mind that balance is key—if you hang up too many items, your kitchen will begin to feel cluttered and suffocating.

5. Incorporate Tissue Boxes

One way to save room and be environmentally friendly is to reuse old tissue boxes. How you ask? Well, according to Good Housekeeping, tissue boxes can be used to store plastic bags that may otherwise take up precious room in your cupboards. Tissue boxes can also hold an array of other small items that may get in the way. Stash away your sticky notes, birthday candles, lighters, and so on.

6. Decide on an Appropriate Colour Scheme

Certain colours can actually make rooms feel larger and more spacious. According to HGTV, bright and bold tones can best create the illusion of more space as opposed to colours that are less striking and muted. So think plenty of orange, or a bold green or a dazzling light blue.

8 Stellar Strategies for Making the Most of a Small Kitchen - Put Up Shelves

Image Credit

3. Don’t be Afraid to Put Up Shelves

Install as many shelves as you possibly can, in keeping with the overall design of your small kitchen space. Shelves are easily installed and come in a wide array of shapes, sizes and designs. They are arguably the most effective way to store items in a small space in as tidy a way as possible.

7. Consider Striking Wall Art

If you have room on your walls that hasn’t been taken over by shelf or hook space, make use of the area by hanging a large painting, print or a series of stylish family photos. This is a great move because, as Elle Decor noted, larger pictures can actually make rooms feel more sizeable.

8. Use Your Oven for More Than Baking

If you have a small kitchen and are super short on space, why not make use of all the extra room you possibly can. Consider using your oven for storage. If you have limited cabinet space, you can store things such as baking sheets, cooling racks, pans and tins in the oven. (Just don’t forget to take them all out before turning the oven on!)

If you have a small kitchen you’re looking to upgrade, head Kitchen & Bath Classics showroom for more tips and tricks on how to make the most of your space and create a small modern kitchen you’ll love.

Featured Image Credit

7 Ways to Create the Perfect Cozy Kitchen in Your Home

7 Ways to Create the Perfect Cozy Kitchen in Your Home

You spend a large part of your day in the kitchen. The average Canadian spends an average of two hours a day on meal preparation, eating, and cleaning. If you have a large family, this number is probably closer to three or four hours a day. For this reason alone, it’s worth making sure your kitchen is an enjoyable, comfortable place to be. Doesn’t a cozy kitchen sound better than a stark, medical-feeling kitchen?

By making a few small changes, you can make your kitchen even more inviting. That way, the space becomes more than a place to whip up dinner and do the dishes. Instead, it transforms into a dynamic and exciting place to spend your time.

Consider these tips to turn your regular cooking space into a cozy kitchen you’ll want to spend time in.

7 Ways to Create the Perfect Cozy Kitchen in Your Home - Focus on Seating

Image Credit

1. Focus on Seating

Your kitchen won’t be truly cozy unless it has comfortable seating. After all, if you want your kitchen to be a nice place to spend time, it needs to have a pleasant spot to take the load off.

We recommend centring the seating around a central piece of furniture (like an island or dining table). If you have the space for an eat-in kitchen, this is a simple way to create a cozy kitchen.

Even if you are lacking in space, you can still give your kitchen a bit of depth. Use an island or small table to expand counter space, and select a few barstools or chairs. This way, your family can grab a healthy breakfast or catch up over a mid-afternoon snack. Adding a bit of seating also makes your kitchen a good spot for treating guests to a homemade cocktail.

There are plenty of other ways to give your kitchen some vibrance. Try adding some decorative towels or knick-knacks you’ve picked up along the way. You can also add some interesting wall art to create a focal point in your design.

2. Bring in Some Colour

Want to save money while still bringing some personality into your home? Try picking up a few gallons of paint and adding a new colour to your walls! A fresh paint job will give your kitchen a new sense of character.

To add a bit more flair, choose a bold colour for a focus wall, and paint the rest of the walls a more subdued colour.

7 Ways to Create the Perfect Cozy Kitchen in Your Home - Consider Lighting

Image Credit

3. Consider Lighting

After you paint your kitchen, it’s time to consider your existing lighting fixtures. It may be time to replace the light bulbs with something brighter, or to spruce them up with more modern styles. Changing the lighting in your kitchen is a simple way to brighten up the space.

Natural lighting is also something you can take advantage of. If your windows are covered up by drapery or blinds, brightening your kitchen can be as simple as opening them up!

For a bit of privacy, consider using sheer panels as drapes. These will allow light to flow through your window while still providing you with an extra layer of protection.

4. Find Ways to Reduce Clutter

Do you find yourself avoiding your kitchen due to the mess on your countertops? You’re not alone! Research has found that clean, open spaces are appealing, while cluttered countertops are not. Luckily, this is an easy and straightforward problem to address.

First, find ways to get organized. Clean up your old junk mail and drawer, sticky notes, and other items that are piling up. Reduce the number of decorations taking up space on your counters. This will help create a calmer atmosphere in your cozy kitchen. You should also make sure your family is on board with staying organized.

Next, consider ways to increase the amount of useable space in your kitchen. Hanging pots and pans overhead can be efficient and stylish, but can look crowded. Instead, try installing a magnetic knife strip on the wall. This will give your kitchen a level of visual depth while improving accessible areas. You can have one for knives, and another for lighter pans.

And finally, don’t underestimate the power of putting utensils and appliances away when you’re finished with them. Keeping your cabinets and drawers organized will help compel you to actually use them!

7 Ways to Create the Perfect Cozy Kitchen in Your Home - Go Natural

Image Credit

5. Go Natural

A cozy kitchen isn’t only about having a small space or the feeling of warmth. It’s also about having a sense of soul, which can come from living things like plants! A few well-places plants is a great way to make your kitchen feel alive.

There are dozens of low-maintenance plants available that will look great in your home! You can even decorate your window sill with planted herbs or other edible plants. That way, you can decorate your kitchen while filling your space with home-grown produce.

6. Keep Things Clean

Despite all the work you put into making your kitchen more inviting, it can all be for nothing if you let a mess build up. It’s important to keep everything spick and span, since you won’t want to spend time in a dirty or messy kitchen.

Try to clean up as you cook to reduce the time it takes you to clean after a meal. And set aside time each week to clean the bits of your kitchen that you can’t get to during your regular routine.

7. Bring in Something New

If you’ve gone through all the steps above and think your kitchen needs something extra, upgrade an appliance or fixture. The perfect sink or faucet may be enough to give your kitchen that extra appeal. When you upgrade your fixtures, consider trying a different finish like brass or brushed bronze.

Whatever your kitchen update needs are, one of our knowledgeable showroom consultants can help. Stop by your local Kitchen & Bath Classics showroom to get started.

9 Hot New High-Tech Smart Kitchen Appliances

9 Hot New High-Tech Smart Kitchen Appliances

Innovation waits for no one! Just as you’d upgrade your phone or computer to the latest and greatest version every few years, it also makes sense to take advantage of all the high-tech upgrades that are now available for your cooking appliances. Become the next tech expert on the block with all the best kitchen gadgets for a smart kitchen.

Here are some of the coolest high-tech appliances you can find for your smart kitchen:

9 Hot New High-Tech Smart Kitchen Appliances - Fridge with WiFi

Image Credit

1. Refrigerators with Built-in LCD Tablets

Want to make a digital grocery list and then email it directly to yourself? Looking to text your spouse that you’re running late and they should put your dinner in the fridge for later? How about changing your dinner party music when you head to the fridge to grab another bottle of wine?

There are plenty of refrigerators available that have LCD tablets with WiFi and Bluetooth capabilities built in. This brings smart phone or tablet functionality to your icebox. Raise and lower the temperature remotely with your phone. Some new fridges even have cameras inside the the fridge! You can activate them remotely to see the contents of your fridge on the go.

2. Remote Kitchen Thermometers

If you’re cooking a full turkey or roast, getting the level of doneness you’re looking for takes time and patience. Rather than be stuck in the kitchen for several hours, smart meat thermometers can be placed in whatever you are roasting, allowing you to check doneness remotely via an app on your phone.

3. Programmable Coffee Makers

Love to wake up to the smell of fresh coffee brewing? A programmable coffee maker may be just the ticket! These smart appliances can be pre-loaded with water and grounds and a timer set to start brewing so that, by the time you’re up and about, you’ve got a fresh pot of coffee waiting for you. Some smart coffee makers even have WiFi capabilities, allowing you to adjust how strong you want your coffee—perfect for those mornings after a restless night!

9 Hot New High-Tech Smart Kitchen Appliances - Smart Dishwasher

Image Credit

4. Smart Dishwashers

Innovations in dishwasher technology have been focused largely on maximizing energy efficiency and reducing water usage. According to CNET, the best smart dishwashers for your kitchen are the Bosch SHS63VL5UC, the GE GDF610PMJES, the LG LDT9965BD, and the Frigidaire FGID2466QF.

5. Touchless Trash Cans

When you’re cooking, the last thing you want to do is to wash your hands after throwing something away. Some trashcan makers have upgraded the traditional food activated trashcans and created smart bins that open and close automatically when you wave your hand over them. According to Besttouchlesstrashcan.com, the top 5 touchless trashcans are as follows:

  1. iTouchless Deodorizer Touch-Free Sensor Can
  2. Nine Stars DZT-50-9 Infrared Touchless Can
  3. Simplehuman Semi-Round Sensor Can
  4. BestOffice Infrared Touchless Trash Can
  5. iTouchless Dual Trash Can

6. Smart Slow Cookers & Pressure Cookers

With winter underway, the virtue of a slow cooker is that you can simply add ingredients to the pot in the morning and have a delicious, hearty meal waiting for you when you get home. Smart slow cookers do this even more effectively, allowing you to remotely turn on and off the cooker as well as raise and lower the temperature as needed.

According to Nerdy Tech, the best smart slow cooker out there is the Crock-Pot SCCPWM600-V2. This slow cooker by Wemo is WiFi-enabled and can be controlled remotely. On the other hand, the Instant Pot IP-Smart Pressure Cooker is the best slow cooker for a smart kitchen, Nerdy Tech reports. Pressure cookers allow you more control over cooking than a standard slow cooker. The Instant Pot IP-Smart Pressure Cooker gets hot quickly and you can control it from your favourite mobile device.

9 Hot New High-Tech Smart Kitchen Appliances - Flex Duo Oven

Image Credit

7. Flex-Duo and Intelligent Ovens

Need to cook two different dishes, but don’t want to stagger preparation? A flex-duo oven allows you to cook two distinct dishes at different temperatures simultaneously! Prepare dinner and dessert at the same time. Alternatively, intelligent ovens automatically calculate how long and how hot to cook food, simply by processing what you’ve put in the oven and your preferred level of doneness.

8. A Smart Scale

Accompanied by its own app, the Drop Scale is a smart kitchen technology that makes recipes a breeze. How it works is, when connected to its app, the smart scale takes you step-by-step through endless different recipes, and the app tells you precisely when you’ve added enough of an ingredient. This means measuring cups can become a thing of the past with the Drop Scale.

9. 3D Food Printers

The future has arrived! Like something out of Star Trek, 3D printing technology can be used to create simple, cookable foods out of component parts on demand. The technology is still limited and has yet to reach market saturation, but keep an eye out for these high-tech food creators hitting stores soon!


Of course, new technology could inspire you to get a new look for your kitchen. Stop by a Kitchen and Bath Classics showroom to get a few ideas for your upcoming kitchen renovation!

Featured Image Credit

8 Important Tips to Make Tiling a Shower Easier

8 Important Tips to Make Tiling a Shower Easier

It’s hard to know how to tile a shower properly, nevertheless how to make it a simple DIY project. No need to go through all the trial and error to tile a nice shower, however. We’ve done all the dirty work. So, after you’ve selected the perfect tile for your shower floor and/or shower walls and it’s time to begin laying tile, follow these 8 tips for an easier way to complete your tiling project.

8 Important Tips to Make Tiling a Shower Easier - Stud Walls in Bathroom

Image Credit

1. Check the Stud Walls

Before laying any tile or even prepping the backer board, you’ll need to check your shower stud walls to make sure they are plumb and level. To do this, place a 4 foot level across all studs. Repeat this action vertically, horizontally, and diagonally.

Studs need to be plumb and level so that walls are waterproof and tiles don’t end up looking irregular, especially in corners. According to Home Repair Tutor, the easiest way to fix studs is to sister a second stud to the one that’s crooked. Use 3 inch deck screws or nails to attach the new stud to the old one and check that it’s now plumb and level.

2. Prep the Backer Board

Preparation is an important part of laying tiling for a shower floor or shower walls. Of course, you’ll first want to remove the old tile. Then, place a cement backer board as a foundation to install your shower tiles. During this step, check to ensure the cement backer board is sound and sturdy.

If the cement backer board is not soundly in place, you’ll need to add the additional step of removing the old backer board before installing a new cement backer board altogether.

3. Plan the Layout For the Tile

Preparing a layout for your tile will prevent slivers of tile at the ceiling or corners and will provide you with a distinct guideline to follow. All you need for this step is a pen, paper, and measuring tape.

While in the layout prepping stage, plan to begin on the second row up from the bottom of the shower when tiling. Often, the floor of the shower or the top of the tub won’t be completely square and starting here can lead to a crooked tile installing.

4. Apply Tape and Mask Edges

Now that your walls are well-prepped, you’ll want to first apply mesh tape. Run pieces of this tape over the seams of the cement board. Then, use painters tape to tape off the edges. You can spread a drop cloth over the shower pan during this step to make the masking easier.

8 Important Tips to Make Tiling a Shower Easier - Keep Your Shower Pan in Place

Image Credit

5. Keep Your Shower Pan in Place

Tiling a shower by yourself can be especially hard. If you’re able to keep the shower pan in place, it will remain an overall straight-forward project for the most part. You can build up a shower pan by scratch using tile and mortar. Or, you could even use a ready-made fibreglass pan. These options may add a few kinks to the project because of the inherent nature of pans to leak, The Spruce says.

6. Find the Centre and Measure Properly

An important step in tiling a shower is measuring to make sure you have enough tiles to finish the project and cover your entire shower. Note that you should always have 10% more material on hand than you need to finish the project. This will cover your back (and walls) if any mistakes are made while tiling the shower.

Once you’ve properly measured and are good to go, locate and mark the centre of the wall you’re tiling with a pencil. Then, draw a plumb line as a reference mark as well as a level line, DIY Network recommends. To draw a level line, measure up 13 inches. This is the height of one row of tiles in addition to the grout line. These two marked lines will be your initial guide while tiling a shower.

7. Use Nice, Expensive Thin-Set Mortar

When tiling, apply premium thin-set mortar to the bottom row area. While shopping for the mortar, look for the more costly and premixed mortar in buckets. Opt for this over the less expensive mortar, which is powdered and more difficult to use.

For example, keep an eye out for ARDEX X77 superior sagless thin-set mortar, as suggested by Home Repair Tutor. If used properly, this mortar won’t slide down the wall, and it’s a great option for ceilings being tiled as well.

8. Keep Grout Joints Small

Home Repair Tutor suggests using small grout joints between 1/8 inch and 1/16 inch because they’ll keep cleaning maintenance low for your tile shower. Also, grout joints are likely to expand, so using smaller grout  joints can be helpful and also look better than larger ones in general.

Are you remodelling a bathroom? After your done tiling your shower, head to a Kitchen and Bath Classics showroom for everything else you need including faucets, toilets, showerheads, lighting, and more.

5 Simple Steps to Replace a Kitchen Sink Without Stress

5 Simple Steps to Replace a Kitchen Sink Without Stress

You’ve chosen the perfect kitchen island, a shiny, modern kitchen stove, and all the other necessities needed for a kitchen renovation—even a brand new sink. Now that you have all the goods, it’s time to put them in place. If you need to know a thing or two about sink installation, we’ve got you covered. Below is a quick guide with all you need to know on how to replace a kitchen sink.

5 Steps to Replace a Kitchen Sink

1. Assess Your Existing Sink

First, you’ll want to measure the sink currently in place. If the new sink you’ve chosen has different dimensions and drain locations than the existing sink, you may need to have work done on the countertop opening and/or sink plumbing.

Also, determine what type of sink you have in place already. The two basic kitchen sink designs are under-mounted and drop-ins. Under-mounted kitchen sinks are attached to the countertop from underneath while drop-in sinks are simply lowered into the sink opening on a countertop. There are slight differences in how you remove each type of sink, so you’ll want to know which kind of sink you are working with ahead of time.

5 Simple Steps to Replace a Kitchen Sink Without Stress

Image Credit

2. Prepare For the Sink Removal

Since most of your work will be done in the cabinet under your sink, you’ll want to clear out this area before getting to work. Find yourself some protective eyewear and gloves to prepare to replace a kitchen sink. With a lot of pipes and other hazards to your eyes and hands, wearing personal protective equipment is an important step.

Next, unplug your garbage disposal if you have one. Working with electricity and water at the same time is very dangerous, so unplug your disposal as soon as possible, before you forget. As an added precaution, you may also want to turn off the circuit that the disposal plugs in to.

During this time, also be sure to turn off the water supply to the sink. There should be two separate valves below the sink—one for hot water and one for cold water. Turn both of the handles to shut them off. After you’ve turned the valves off, double check by trying to turn the water on in the sink. The water flow should be gone, but if a few drips occur at first, that’s fine. This step will also relieve water pressure in the lines.

After turning off the water supply, you’ll want to disconnect the water supply along with the garbage disposal. To disconnect the water supply, use an adjustable wrench. While holding the line in place with one hand, use the wrench in the other hand to loosen the nut.

Next, disconnect the drain pipe, which is connected at the bottom of your sink strainer. It should be held in place by a slip nut or a coupling nut, so you’ll need to  loosen the nut as well as the nut at the far side of the P-trap. Then, disconnect and remove the garbage disposal too.

3. Remove the Old Sink

Now comes the fun part—removing the sink itself. First, carefully cut through the caulking around the kitchen sink using a utility knife.

Then, detach the sink from the countertop. This step is trickier if you have an under-mounted sink, and you’ll need another set of hands for assistance. Someone should hold the sink up while the other detaches it. Don’t try to do this step alone, as the sink could fall down onto you.

Finally, reach under the sink and push up or side to side to begin to loosen it. Now you should be able to pull the sink right out of the countertop. Before the new sink installation, be sure to clean up surfaces and spills. Also, mop up any water that has likely come out during the sink removal.

5 Simple Steps to Replace a Kitchen Sink Without Stress - Hole for New Sink

Image Credit

4. Cut a Hole For the New Sink

After successfully removing your old sink, cut a recess hole for the new sink. First, position the new sink face-down on the countertop to ensure the space at the front and back is even. Draw a line around the sink, and then measure the depth of the sink and make another pencil mark at this distance.

Next, use a drill to make a hole in each corner of the sink position inside the line you’ve drawn. Now, support the countertop underneath you and cut around the inside guide you’ve drawn. Use a jigsaw for this, and start at the holes you’ve drilled.

Once you’ve cut the hole, you can check to make sure the sink fits well in the hole. If it does, use a preservative primer to seal the cut edges of the countertop.

5. Install the New Sink

For the final step to replace a kitchen sink, you’ll need to assemble and insert the new sink. To do this, place the faucet into the hole in the sink and secure it under the sink. Also, install the hoses. Next, use instructions provided with your new sink to install the waste assembly and overflow section.

Seal the hole in the countertop next by caulking around the hole or using a gasket or seal that may have been supplied with the new sink. After installing retaining clips around the edge of the sink, tighten them on the underside of the countertop.

Lastly, connect faucets and waste, and you’re good to go!


Are you renovating a kitchen and need a new kitchen sink? Now that you know how to replace a kitchen sink, head over to a Kitchen & Bath Classics showroom to learn more about how to bring the rest of your kitchen together!

14 Bathroom Plant Ideas That Will Brighten Your Home

14 Bathroom Plant Ideas That Will Brighten Your Home

It’s all too easy to let a bathroom become boring and lifeless. But, with the bathroom being a well-visited room in any house, why neglect it? Bathroom plants are a quick and easy way to brighten up dull washroom décor. It’s time to go green!

Whether you have a dark bathroom or a bathroom filled with bright, natural sunlight, these bathroom plant ideas will add a lively touch to any washroom.

14 Plant Ideas for Your Bathroom

14 Bathroom Plant Ideas That Will Brighten Your Home - Cast Iron Plant

Image Credit

1. Cast Iron Plant

If you’re looking for low light house plants, the cast iron plant may be perfect for you. Cast iron plants are ideal for bathrooms because they don’t need too much light, and they don’t require a lot of plant care. Don’t have a green thumb? Don’t worry, cast iron plants can survive even in the most extreme conditions where other plants would perish, according to Master Gardener, Susan Patterson.

14 Bathroom Plant Ideas That Will Brighten Your Home - Pothos Plant

Image Credit

2. Pothos Plant

Another easy houseplant to grow is the pothos plant. This long-growing and leafy vine would make a gorgeous addition to washroom décor. Like cast iron plants, pothos are also plants that don’t need light (at least not a lot of it). These hanging house plants are also great for those who tend to forget to water their plants often.

Be cautious with pothos plants if you have pets or children, as all parts of the plant are poisonous if ingested.

14 Bathroom Plant Ideas That Will Brighten Your Home - Spider Plant

Image Credit

3. Spider Plant

The spider plant is named because of the spider-like leaves or spinderettes, which come in different varieties. Spider plants are easy bathroom plants to care for. They can grow in a large range of conditions and rarely suffer any problems. With well-drained soil and bright, indirect light, spider plants will flourish.

14 Bathroom Plant Ideas That Will Brighten Your Home - Yucca

Image Credit

4. Yucca

The Yucca plant is a versatile indoor and outdoor plant. Easy to care for and maintain, these plants are also one of the top air cleaning indoor plants. With more than 40 species and two dozen subspecies of the plant, there are plenty of options for sizes, shapes and appearance to choose from with the Yucca.

This plant requires bright light and should not be kept sitting in water, so make sure they are in good, well-drained soil.

14 Bathroom Plant Ideas That Will Brighten Your Home - Succulent

Image Credit

5. Succulent

Succulent plants are a big trend right now. These easy-care plants are a vast and diverse group and offer different colours and kinds to choose from. Watering succulents can be tricky for some varieties of the plant. While most succulents are very easy to grow and maintain, there are a few types that have exact care requirements, so be sure to look into how to water your succulent.

14 Bathroom Plant Ideas That Will Brighten Your Home - Cactus

Image Credit

6. Cactus

All cacti are succulents. However, not all succulents are cacti. Nevertheless, cacti are easy to maintain as indoor plants. Some cacti bathroom plant ideas include the Christmas cactus and the Pincushion cactus.

14 Bathroom Plant Ideas That Will Brighten Your Home - Rubber Plant

Image Credit

7. Rubber Plant

Also known as a Ficus elastica, rubber plants are trees that can grow up to 50 feet tall. According to Gardening Know How, “Starting with a young rubber tree houseplant will allow it to adapt to being an indoor plant better than starting with a more mature plant.”

14 Bathroom Plant Ideas That Will Brighten Your Home - Peace Lily

Image Credit

8. Peace Lily

Although not true lilies, peace lilies are best known for their easy care. Peace lilies will make great bathroom plants not only because they are hardy, but they’re also air-purifying. These plants love the shade and a consistent temperature between about 65 and 80 degrees Fahrenheit.

Make sure to keep these plants out of reach, as they’re toxic to cats and dogs.

14 Bathroom Plant Ideas That Will Brighten Your Home - Zebra Plant

Image Credit

9. Zebra Plant

The zebra plant, which can grow up to 6 feet tall, does best in bright, indirect light. The zebra plant is a more finicky houseplant, according to Epic Gardening, and should be watered often. However, known for its striped foliage and breathtaking golden zebra plant flowers, the zebra plant may be an ideal indoor bathroom or houseplant.

Image Credit

10. Bamboo Palm

Have you considered turning your washroom into a lively bamboo bathroom? Originating from Central and South America, the bamboo palm is slow-growing with small palms. These houseplants are ideal for shaded corners and do best as indoor potted plants, SF Gate reports.

14 Bathroom Plant Ideas That Will Brighten Your Home - String of Pearls

Image Credit

11. String of Pearls

With small green bubbles along a thin stem, it’s easy to see where the String of Pearls plant gets its name. The String of Pearls is a succulent and does well in bright light. For this reason, consider placing this plant on a sunny windowsill in your bathroom if you have one. If your bathroom doesn’t get much bright sunlight, locate the plant under a fluorescent light during daylight hours, Gardenista suggests.

14 Bathroom Plant Ideas That Will Brighten Your Home - Jade Plant

Image Credit

12. Jade Plant

Jade plants are a great option for bathroom plant ideas because they’re long-lived. These plants are succulents, making them fairly resilient and easy to care for indoors. While jade plants prefer warm, dry conditions—like those found in most homes—it’s important to remember to keep the soil most, The Old Farmer’s Almanac reports.

14 Bathroom Plant Ideas That Will Brighten Your Home - Air Plant

Image Credit

13. Tillandsia

Tillandsias are different from most house plants. These air plants are extremely easy to care for, as they require little attention. Simply provide an atmosphere that is not too dry that they can’t survive, and occasionally mist them with water.

According to Air Plant City, “if you are growing them indoors and the air is dry, you will need (at minimum) to submerge the plant in water for 2-3 hours about every two weeks.”

14 Bathroom Plant Ideas That Will Brighten Your Home - Aloe Vera

Image Credit

14. Aloe

Aloe vera are popular window plants, and for good reason. These plants offer a wide range of natural health properties (hello aloe vera lotion!), and thrive in sunlight. Keep in mind, aloe plants grow towards the sun. This means in order to keep the plant leaves upright, you’ll need to rotate the pot as needed.


Are you revitalizing a bathroom or perhaps just need more washroom décor ideas? Visit a Kitchen & Bath Classics showroom for the inside scoop on how to create your best bathroom.

11 Useful Tips for Preparing for Your Kitchen Renovation

11 Useful Tips for Preparing for Your Kitchen Renovation

You’ve looked around your kitchen and decided that it’s time to upgrade your kitchen design. Maybe you have your heart set on a new room that exudes rustic charm or a design that screams contemporary elegance. In any case, beginning a renovation project isn’t as simple as choosing your new kitchen and having a construction team get to work. There are a number of things that need to be done in preparation for your kitchen’s fabulous makeover.

Keen to prepare for your kitchen renovation but unsure how to start? Check out our list of tips below:

11 Useful Tips for Preparing for Your Kitchen Renovation - Consult a Contractor

Image Credit

1. Consult With the Contractor

Before beginning a kitchen renovation, meet with the contractor or person in charge of the renovation. Consult with them for an exact timeline regarding when the renovation will take place. Ask for dates and times so you can be proactive about the renovation and plan ahead.

2. Examine the Layout

An important first step is to look at the layout of your current kitchen an assess whether it is the most economical use of space and whether it suits your needs best. For example, do you really like that island with bar stools in the centre? And are you happy with where your faucet is situated? Do you like the window placement?

If the answer is “yes” to such questions, then the remodel will be a simple. But if the answer is “no” the renovation will likely be more comprehensive. But that doesn’t have to be a negative thing. You can completely change the layout of your kitchen, depending on your design and vision. In some cases, there will be limitations in terms of space and other considerations, but the message is the same—don’t assume that your kitchen needs to maintain the same blueprint as before.

11 Useful Tips for Preparing for Your Kitchen Renovation - Apply for Permits

Image Credit

3. Apply for Permits

There is a chance that you may need a permit for your kitchen remodel. This is particularly true if you are looking to extend your property in any way. Be sure to conduct research concerning the permits that you will need and file the paperwork with your local authorities within plenty of time. After all, nothing will be more frustrating than a delayed start to your renovation due to missing paperwork.

4. Notify the Neighbours

In the same way that it’s necessary to notify the government, it’s also crucial to inform your neighbours of your remodelling plan before work begins, the San Francisco Chronicle argued. It is the courteous thing to do, particularly if you anticipate that the remodel will create a lot of noise. Excessive noise could irritate and upset those living around you. To avoid excessive disruption for others, have your contractors begin work at a reasonable hour in the morning and finish up before the evening hours set in. 8 or 9 a.m. is a good starting point, with a 5 p.m. finish time.

11 Useful Tips for Preparing for Your Kitchen Renovation - Plan Your Budget

Image Credit

5. Plan Your Budget

Another crucial step is to ensure that you have your budget planned before you even call the contractor. Work out how much you can afford and be sure to keep as close to that figure as possible. Without a planned budget it can be easy to overspend by a significant amount. For a rough idea of where your funds should be allocated, Christopher Peacock, quoted in House Beautiful, suggested that the majority of your budget—around 60 percent—should be spent on cabinetry, with the remaining balance going toward the countertops and any new appliances you may wish to purchase.

6. Keep Appliances in Mind

If you would like new appliances, such as a stove or fridge, you will need to ensure that your kitchen has the adequate space to accommodate them, Parade of Homes explained. That’s why it’s important to take measurements of your entire kitchen space prior to you make any purchasing decisions. Keep the measurements stored on your phone or laptop for easy access. The size of your new appliances may inform whether or not opt to expand the size of the kitchen or keep the current layout.

11 Useful Tips for Preparing for Your Kitchen Renovation - Consider Your Lifestyle

Image Credit

7. Consider Your Lifestyle

Before you settle on a design and style for your new kitchen lifestyle, take your lifestyle into consideration. Your lifestyle impacts the kind of kitchen space that will suit you best. Consider things such as the following:

  • Do you have a large family?
  • Do people congregate in your kitchen?
  • How often do you entertain?
  • Do you cook every night or do you prefer to eat out?

Once you have a clearer understanding of what you will need from your kitchen, it will be easier to strategize in terms of layout, design and appliances.

8. Ensure Your Design is Efficient

While you may have your dream aesthetic in mind, it’s wise to consider whether your ideal design is actually functional and uses space as efficiently as possible. If the answer is no, it may be time to take a different approach to your design. After all, while kitchens should indeed look captivating, sacrificing efficiency for design is never a good idea.

11 Useful Tips for Preparing for Your Kitchen Renovation - Enlist a Designer

Image Credit

9. Consider Enlisting a Designer

If you’re struggling to envision your perfect kitchen, a surefire solution is to enlist the services of a trusted designer. This strategy can be costly, but it’ll be more than worth it if your dream kitchen remodel comes to fruition. HGTV also explained that designers are particularly useful when it comes to lighting design.

10. Plan Meals Ahead

Since you may not have access to your stove-top or kitchen oven, try to prepare meals ahead of time for the renovation times. You’ll also want to designate a kitchen stand-in since your normal go-to spot for making meals will likely be under renovation.

While eating out is an option during this time, dining out can quickly get expensive and strain your budget. So, set up a temporary kitchen. Choose a space that’s away from the construction so kitchen pieces are particles won’t be a problem. For example, set up a few portable tables in the basement or even your garage.

11 Useful Tips for Preparing for Your Kitchen Renovation - Keep Track and Take Pictures

Image Credit

11. Keep Track and Take Pics

Before your kitchen renovation begins, get a bulletin board to set up in your home. Use this board to track the remodelling progress. Take pictures as often as you can and keep a checklist on which you can mark off each step as it’s completed. These tricks will help ease your frustration. They’ll also show you just how far your kitchen has come and how close you are to having your goal kitchen!

Getting ready to upgrade your kitchen? For more kitchen renovation tips and advice, head to a Kitchen & Bath Classics showroom and chat with one of our experts.